By Vibrant Dot Staff
Despite what you may think, makeup brushes are not reserved for just makeup artists and pros. In fact, you may notice that some of the most renowned makeup artists use their hands and fingers to blend and apply makeup to the skin. Yet, for most of us, especially makeup beginners, we need extra help and tools; so here is when makeup brushes can be very handy.
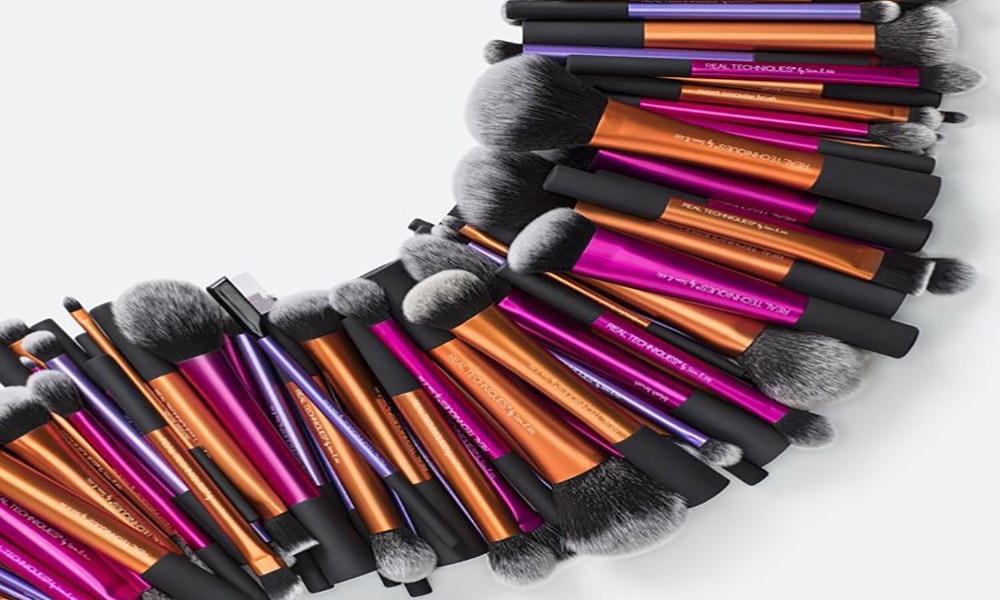
The thing is, there are so many makeup applicators on the market! They come in not only in a wide range of sizes, but also different materials, bristle, shapes, lengths and density – making it even harder to figure out exactly what you need in your makeup kit.
Before we move on any further, let’s clarify on the baseline when it comes to purchasing makeup tools. Natural bristle brushes are more porous, hence making it perfect to blend dry products (i.e. powder makeup) more evenly. On the other hand, when you are using liquid or cream products, opt for synthetic bristles as they will absorb less product.
Secondly, bear in mind that the upkeep of your makeup tools is just as paramount as the purchase itself. It is recommended that you wash your brushes about once a week (more frequent if you wear heavy makeup). This is not solely for hygiene purposes, but clean brushes will also help you achieve your desired shade.
We can fairly say that better made brushes have higher price tags, in which they have a longer “life span”. Your brushes go through a lot of wear and tear between application and washing. Cheaper brushes tend to fall apart and lose bristles easily, resulting in you buying more brushes over time. As a wise consumer, how would you choose?
If you are ready to step up your game yet don’t know how to begin, we got your back. Here are the 10 Must Have Makeup Tools — nothing more, nothing less.
Foundation Brush
While using a brush for your liquid foundation is optional (because you can always opt for a beauty blender or clean fingers instead), the main point is to create a smooth, seamless canvas base. Foundation brushes are typically dense and pinched flat (like a paintbrush), or sometimes dome-shaped.
How-to: Apply foundation on the face by starting from the middle of your face (cheeks and T-zone) towards the hair line. Continue in the same motion and direction until the foundation is blend out smoothly. Try to even out brush strokes to prevent harsh makeup lines around the edges of your jawline and hairline.
Editor’s pick: KAT VON D LOCK-IT EDGE FOUNDATION BRUSH
Beauty Blender

While it requires some skill to master the use of foundation brushes, try the next best alternative – the beauty blender (a.k.a. beauty makeup sponge). Thanks to their smooth and rounded shape, these makeup sponges won’t leave behind any weird lines or stray bristles, giving you an airbrushed finish effortlessly. Also, their damp surfaces help sheer out your foundation, concealer, or cream blush for a natural finish.
How-to: Prior to applying makeup, saturate the beauty blender with running water and squeeze out the excess. Repeat this process for a couple times to ensure the beauty sponge is soaked enough. Normally this process will enlarge the beauty sponge, making it softer and fluffy. This wetting process is necessary to prevent the makeup sponge from soaking up all of your foundation (because it’s already damp with water). Also it helps to blend your makeup smoothly. The broader side of the beauty sponge is used to stamp and stipple your liquid formulas, while the sponge’s tip is to reach the nook-and-crannies around your nose and under eye areas.
Editor’s pick: BEAUTYBLENDER THE ORIGINAL BEAUTYBLENDER
Large Powder Brush
Whether you’re devoted to loose or pressed powders, these long, dense and fluffy bristles will disperse the product evenly over your face. Often it is paired up with setting powder, where it is meant to lightly “set” your foundation or concealer for it to last throughout the day. This particular brush is also happens to be the most widely used makeup tool, so put it down on your to-buy list, if you haven’t.
How-to: Use the fluffy bristles to pick up a thin layer of loose powder. Shake off the excess by tapping the brush (Don’t blow!). Dust it over your T-zone and under your under-eye area. Apply with large sweeping motions and buffing whenever necessary.
Editor’s pick: REAL TECHNIQUES POWDER BRUSH.
Angled Blush / Bronzer Brush
This long, fluffy bristles-filled brush can be used to apply blusher as well as bronzer. Typically it comes in dome shapes, but we find the angled brush especially handy in contouring the cheekbones and defining the facial structure with shading. A softer bristle will create a subtle flush, while the densely packed brush will deliver a stronger colour pay-off.
How-to: For blush, simply find the apple cheeks, and lightly swirl the product upwards towards the ears. For bronzer, loosely sweep the brush in a “3” pattern, starting from your forehead, cutting across your cheekbones, then moving back out and down to your jawline.
Editor’s pick: SIGMA BEAUTY F23 SOFT ANGLED CONTOUR BRUSH
Eyeshadow Shader Brush
Credit : URBAN DECAY
An eye shadow brush is the basic brush you need to apply eyeshadow. In fact, it’s the key for getting an opaque, even layer of colour on your eyelids. These brushes are typically flat, rounded at the tip and dense, so they are capable of picking up eyeshadow powder and packing the pigments on the eyelids.
How-to: Dip the brush head on the eyeshadow. Shake off the excess by tapping the brush (Don’t blow!). Pat the product on your eyelids, then gently sweep the shadow over the lids, starting from the inner corner working outwards, until they are blended out in a nice gradation. Avoid applying eyeshadow with a heavy hand, as it’s considerably easier to build colour than to subtract.
Editor’s pick: URBAN DECAY PRO ICONIC EYESHADOW BRUSH
Eyeshadow Blending Brush
Unlike a shader brush, an eyeshadow blending brush blends out the powder for a sheer, diffused finish. Blending is crucial to create a beautiful colour transition, or better known as gradation, and also blur out harsh edges. Generally these brushes come in a tapered shape and are better identified by their soft, fluffy bristles.
How-to: Place the brush on the crease of your lids, swirl in circular motions to diffuse the eyeshadow, starting from the outer eye corner to inner eye corner, until you get a nice blended look.
Editor’s pick: CHARLOTTE TILBURY EYE BLENDER BRUSH
Eyeshadow Pencil Brush
While the other eyeshadow brushes are too big or too fluffy, a pencil brush gives you more control in applying eyeshadow on small areas (i.e. inner eye corners, lash lines). This brush can be easily identified by its short, dense, pointy bristles.
How-to: Pick up eyeshadow powder and apply it at the inner and/or outer eye corners to give a precise look. Besides, you can use it to smoke out your eyeshadow underneath the bottom lashes.
Editor’s pick: MAC 219S SYNTHETIC PENCIL BRUSH
Eyebrow Brush
Credit : kyness_makeup @ Instagram
This makeup tool is essential for you to achieve the perfect eyebrow arch and fuller brows. This brush usually comes in dual-end: a flat, firm and angled bristle at one end and a spoolie on the other end. Eyebrow brushes can be universally used with brow creams, gels and powders.
How-to: Fetch eyebrow product using the slanted bristles and fill in the sparse areas in between the brow hairs. Comb your eyebrows according to the direction of hair growth with the spoolie to soften them. Alternatively, you can de-clump eyelashes with this spoolie.
Editor’s pick: ANASTASIA BEVERLY HILLS BRUSHES #12
Lip Brush
Applying lipstick directly can be tricky, especially when it comes to the corners. This is why you need a lip brush to achieve a neat and precise lip look. This is also a more hygienic method whenever you’re knowingly sharing a lip product (which explains why this makeup tool is essential for makeup artists).
How to: Take some lip product with the lip brush and use it as a lip liner to outline the lip shape before filling it entirely.
Editor’s pick: E.L.F STUDIO RETRACTABLE LIP BRUSH
Eyelash Curler
Credit : Panasonic
Frankly speaking, to use a mascara without curling your lashes is just like applying hair spray on straight hair without curling it. There are so many eyelash curlers out there in the market; they vary between sizes, arch curves and even shapes. Aside from the classic clip-design, nowadays we have eyelash curlers which look like nail clippers, and some are even powered by electricity (i.e. heated comb).
Editor’s picks:
(the classic) SHISEIDO THE MAKEUP EYELASH CURLER
(the starter) MUJI EYELASH CURLER
(the painless) PANASONIC HEATED EYELASH CURLER WITH COMB DESIGN